Formatting with the CSS "Box Model"
This article can be used both as a stand-alone reference or as Part 11 of our series on making a p-value calculator web app. Please see Part 1 for an overview of this project.
Overview
In the last section, we started to apply formatting with "Cascading Style Sheets", or CSS, to make our p-value calculator a bit more attractive:
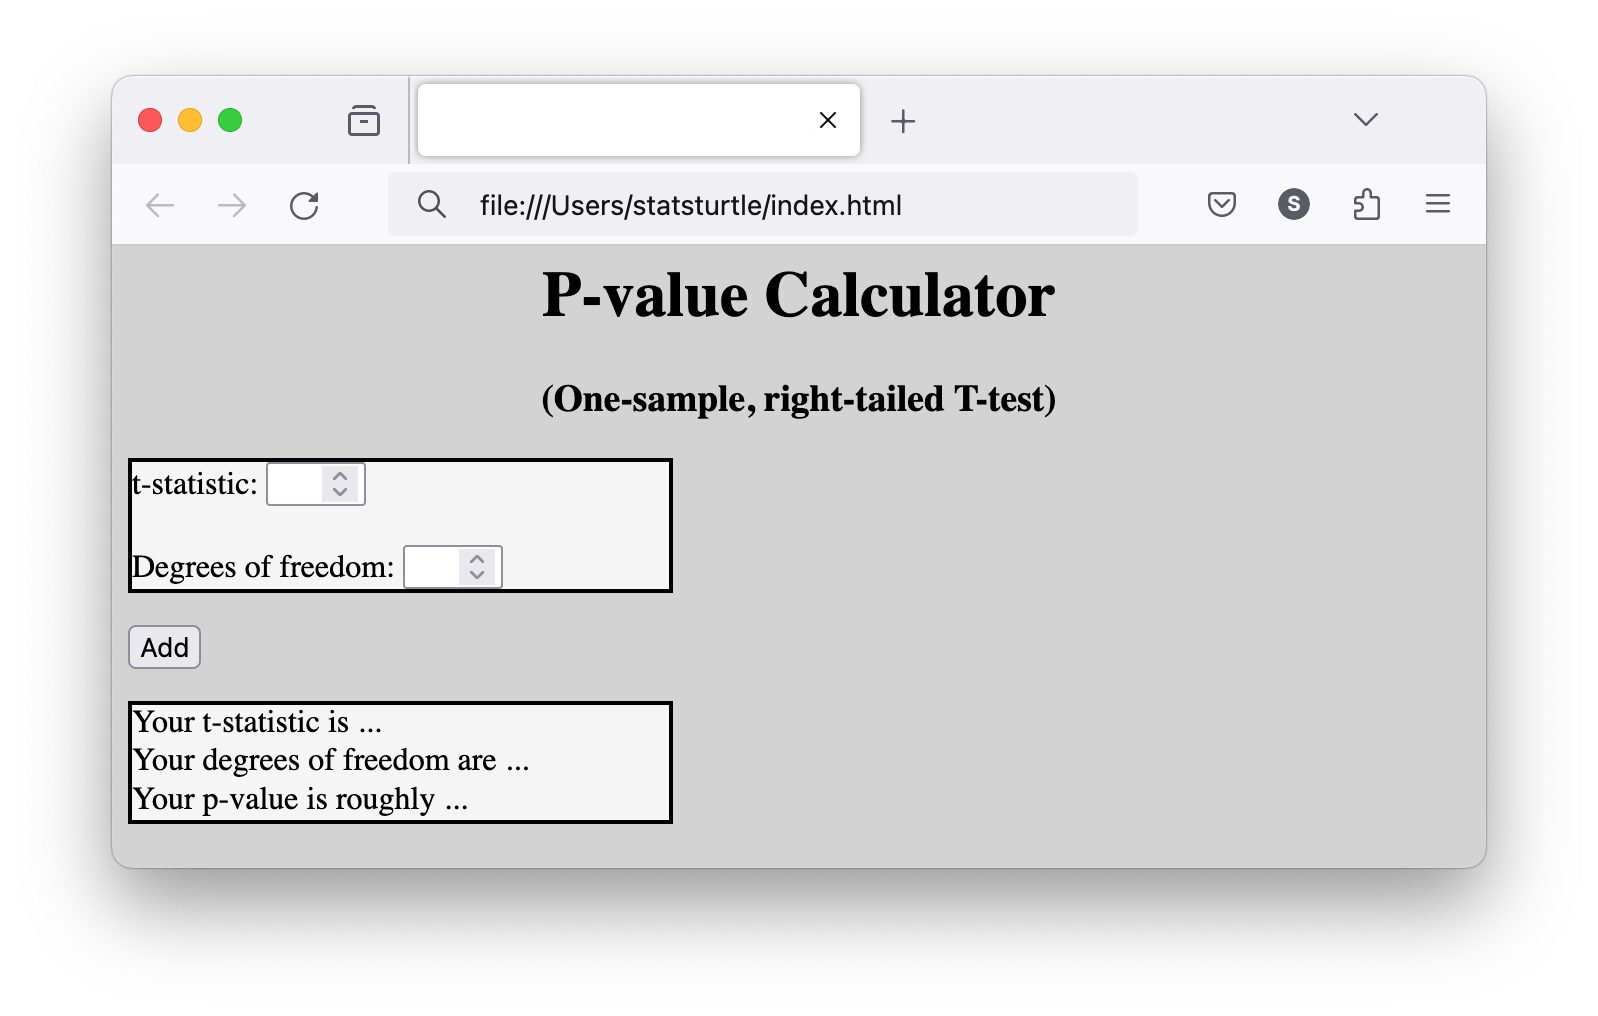
However, there are still some obvious visual improvements to be made:
Centering the containers and "calculate" button on the page
Adding some buffer space between text and the container borders.
Let's see how we can touch up these aspects!
Prerequisites
- Basic familiarity with HTML (see lessons 3-5 of this tutorial series)
- Basic familiarity with CSS Styling (see the previous lesson)
Instructions
Recall that in the last section we used the
borderattribute in CSS to draw a solid black line around our<p>elements. By doing so, we learned that that element has a box around it. It turns out that all HTML elements have this box.We will examine the properties of these boxes by using the "Inspector" tool in your web browser. Click F12 to open the "Inspector" tool. You can also right click and choose the "Inspector" option:
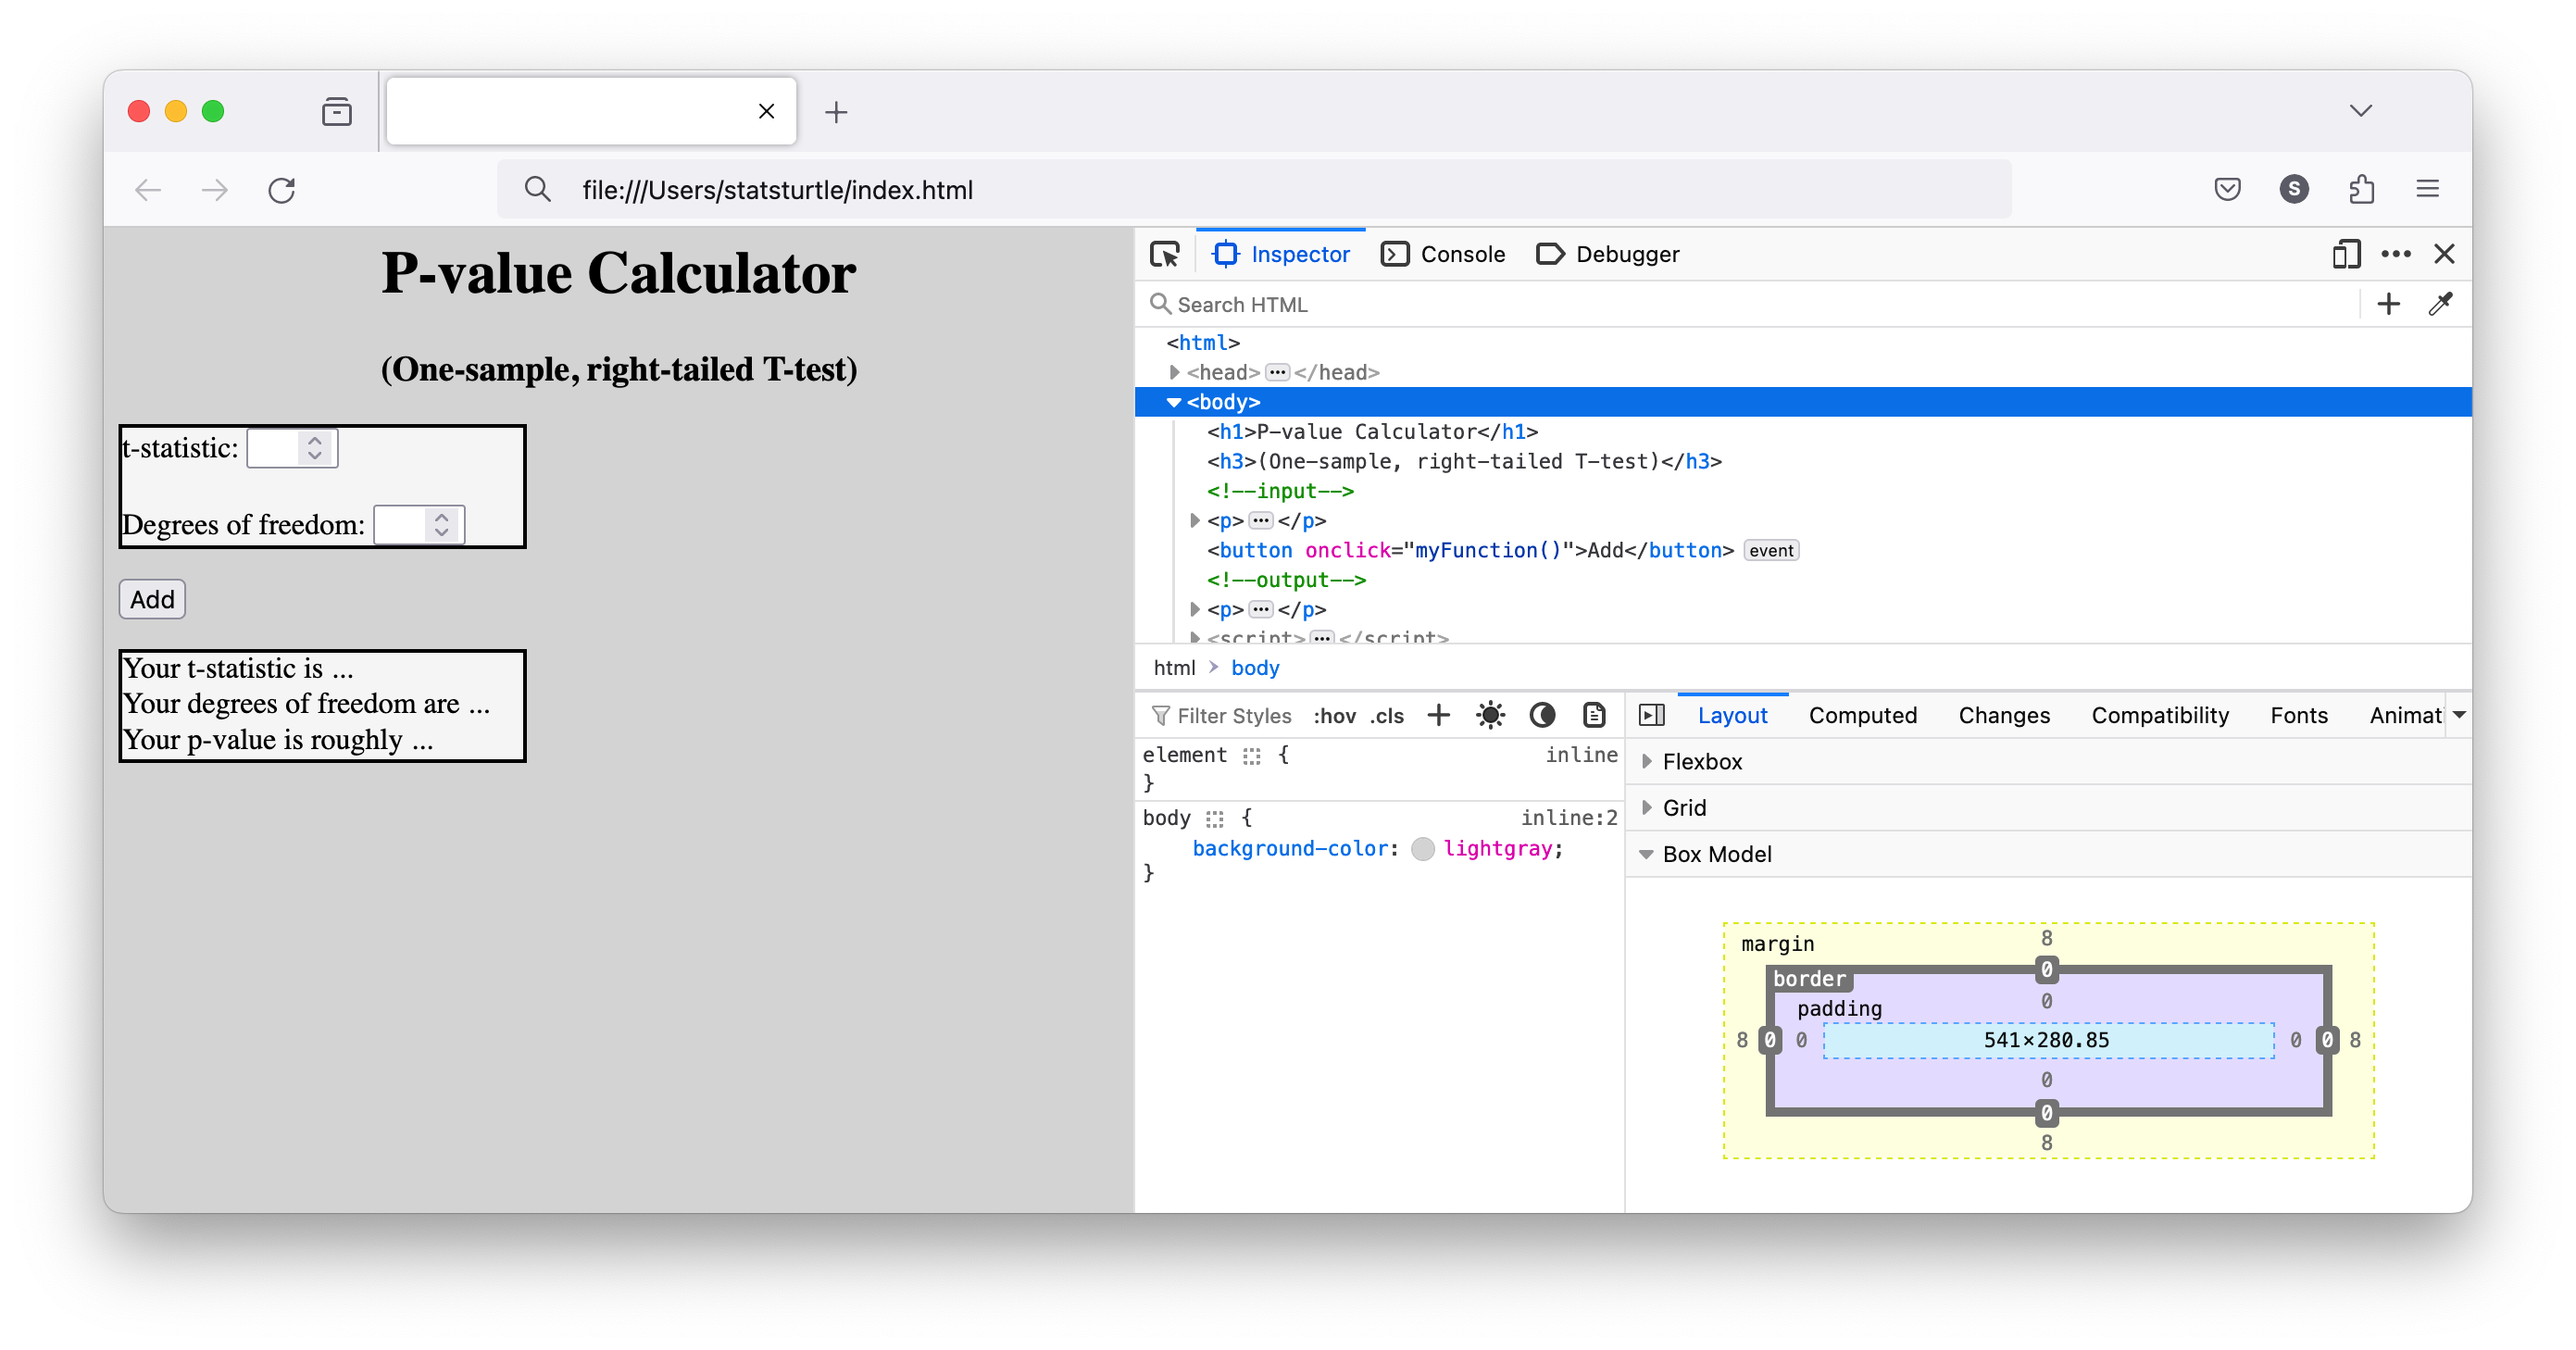
As you can see, the inspector tool has quite a lot of menus and features. These make it a very valuable tool for front-end web developers. Don't feel overwhelmed, however -- we will only be using a few of them.
Depending on your browser, the layout of this area may differ slightly. However, the inspector toos lf all major browsers are quite similar.
Make sure that the "Inspector" tool is selected:

If you look at the "layout" view, you can see the Box Model:
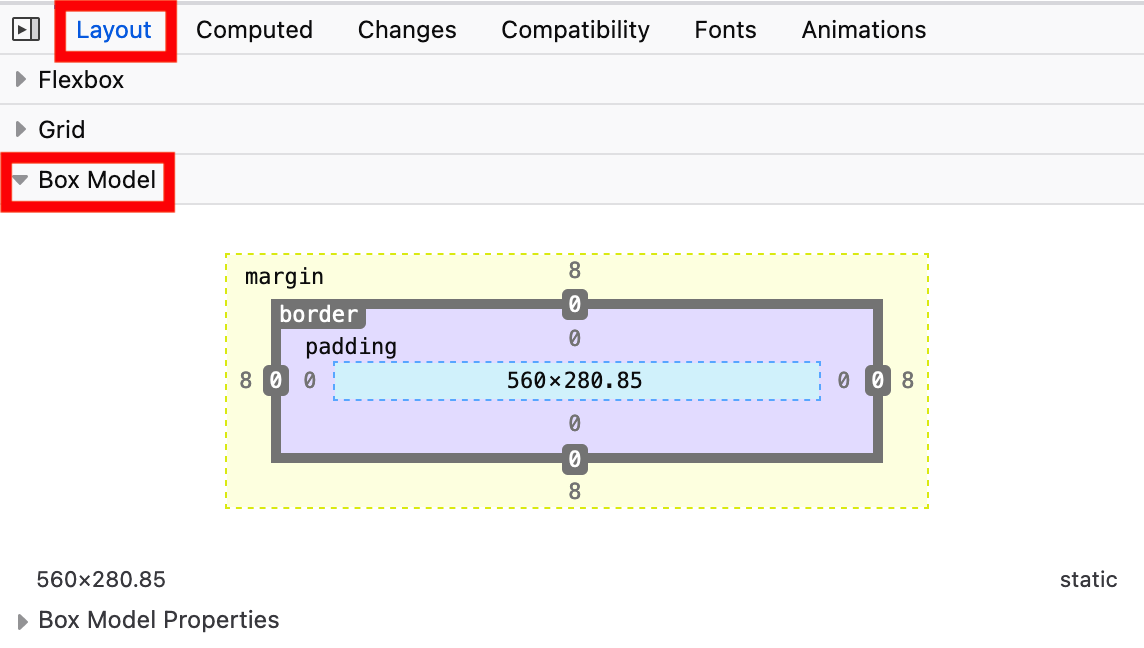
Each HTML element has a box" around it which is invisible by default.
You can find a comprehensive explanation of the Box Model at w3schools.
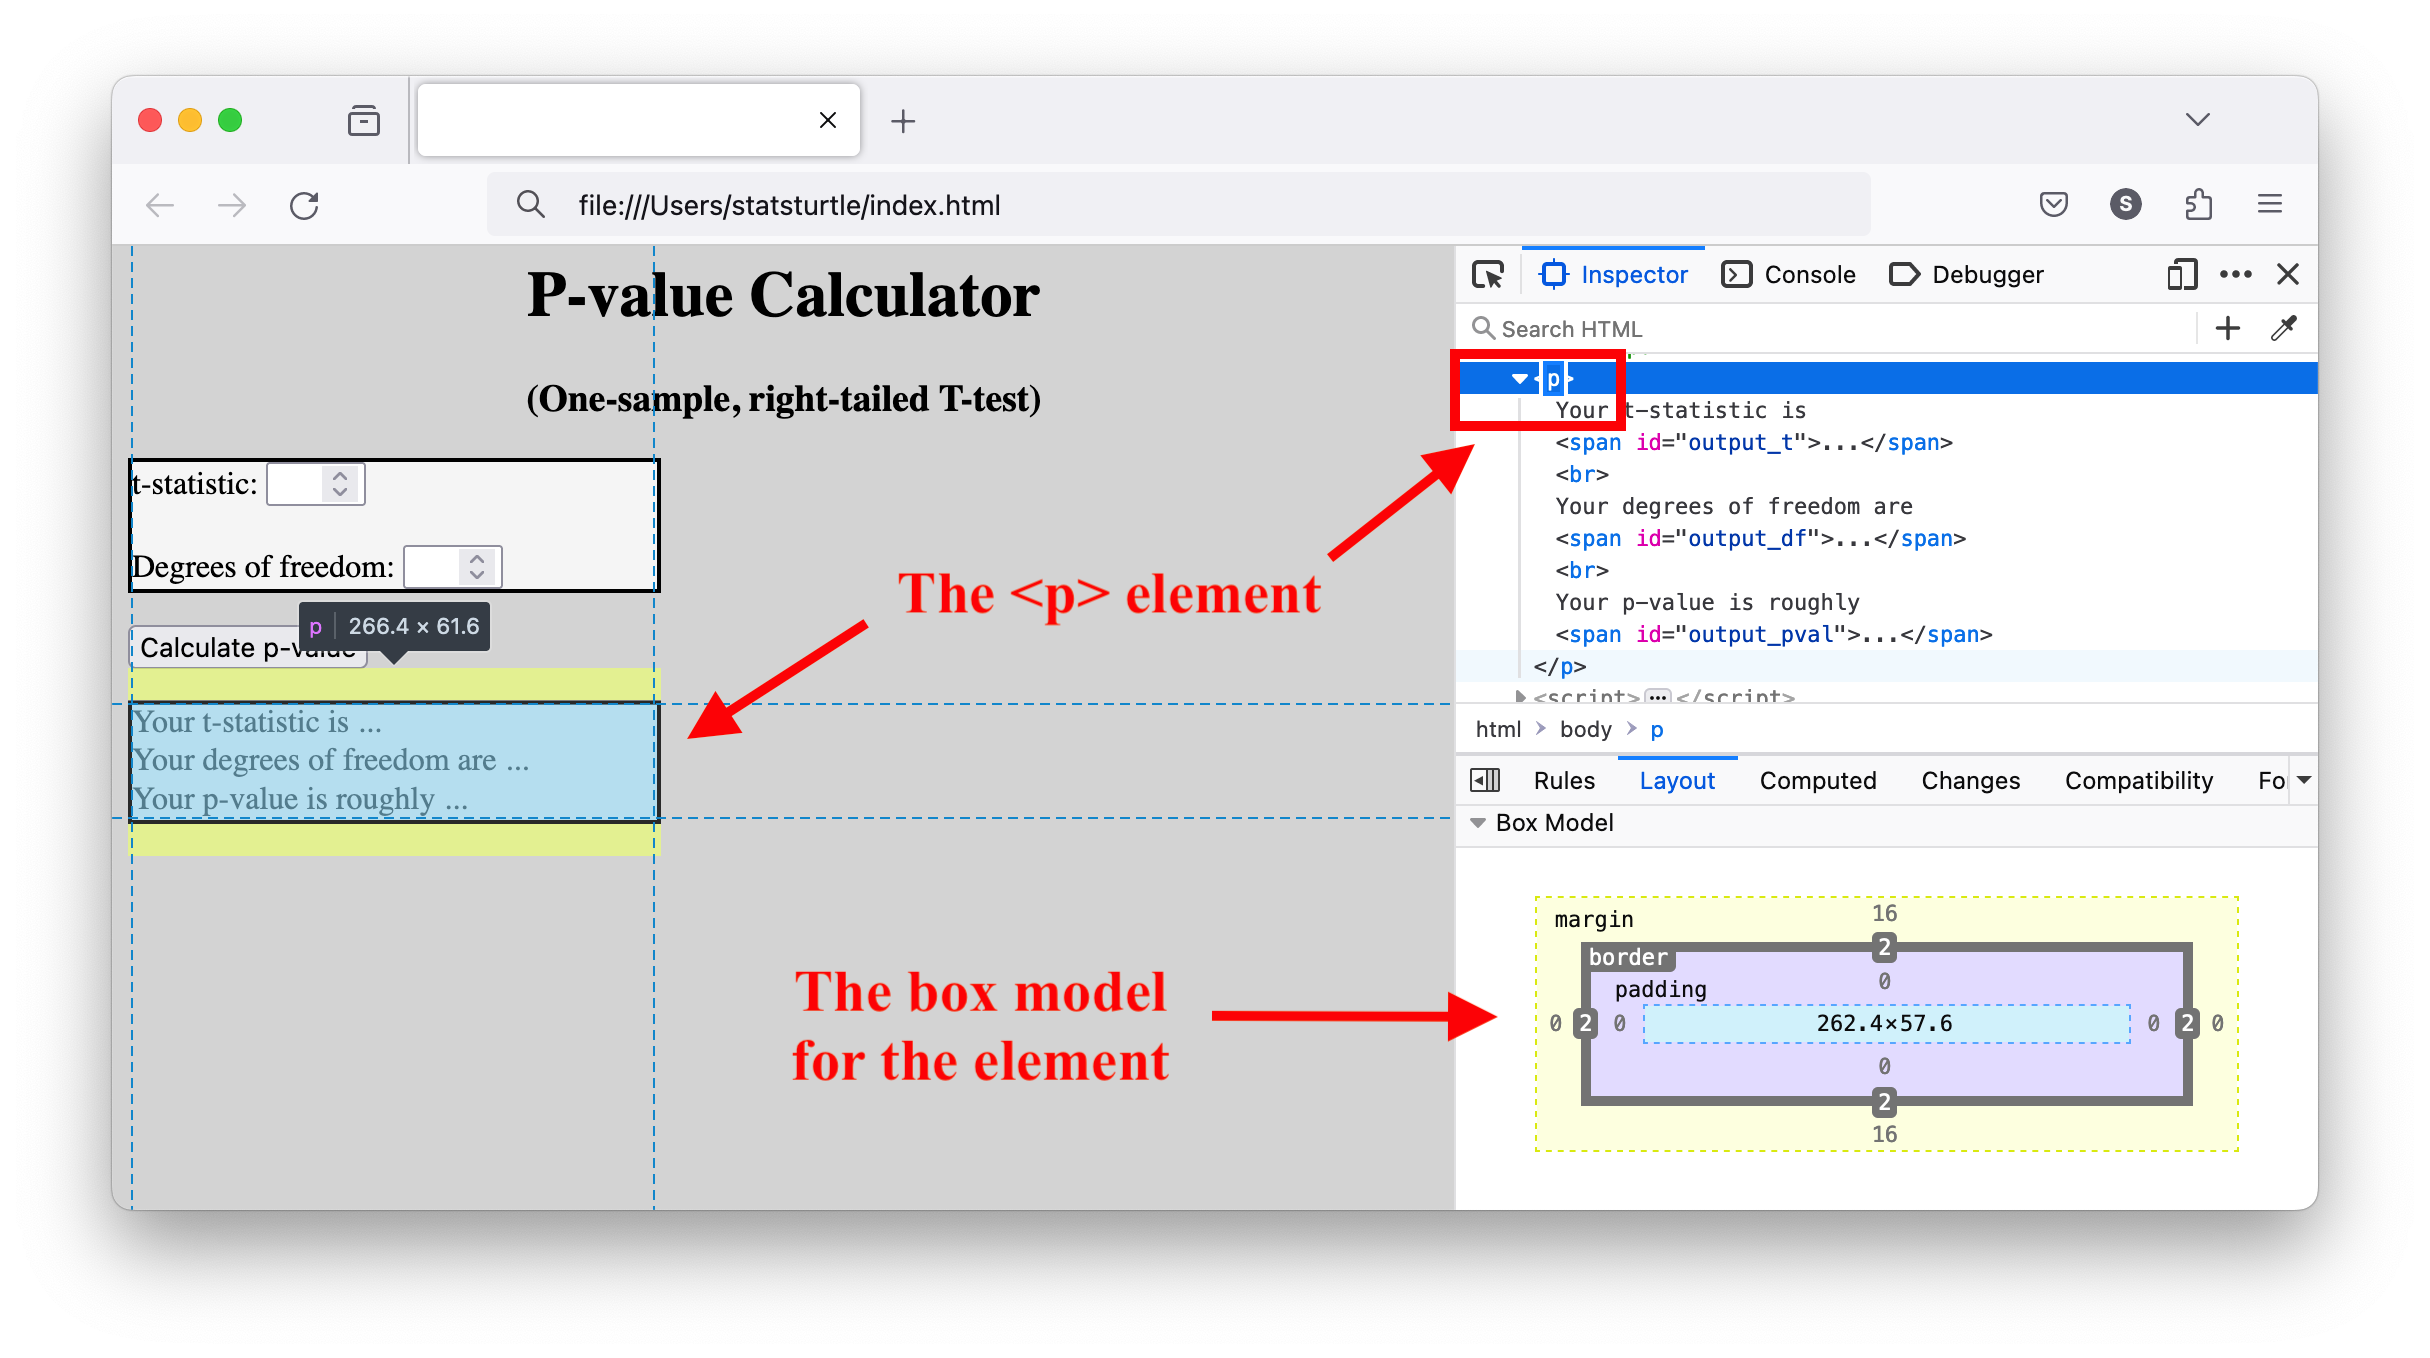
We can examine the margin, border, and padding of one of our
<p>elements:
[Detail]
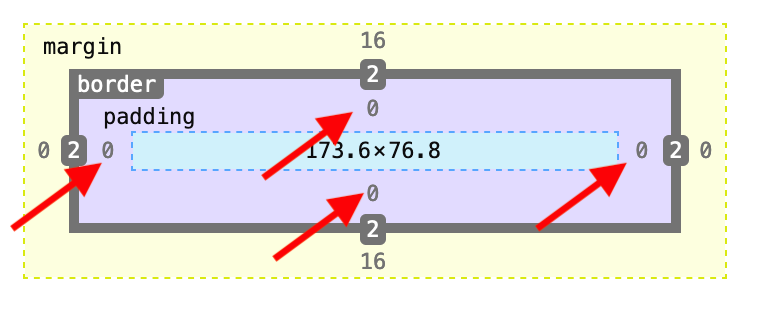
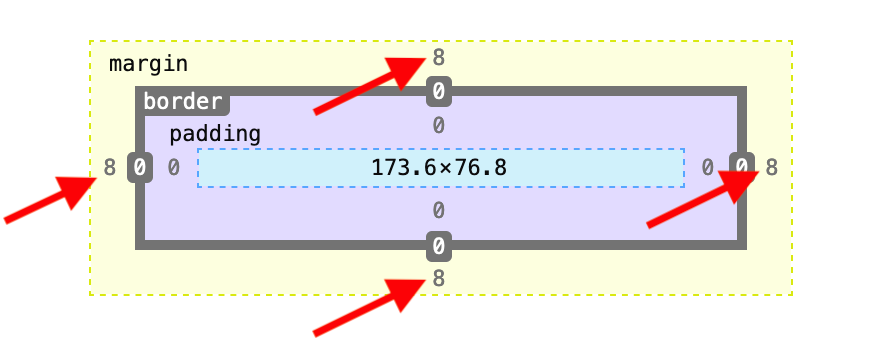
We can see that the element in question has a padding of "0" pixels on all four sides:
... and a margin of 8 pixels on all sides:
We can adjust these defaults with CSS! Let's go back to the our CSS attributes in our HTML document between the
<style></style>tags in the<head>section.
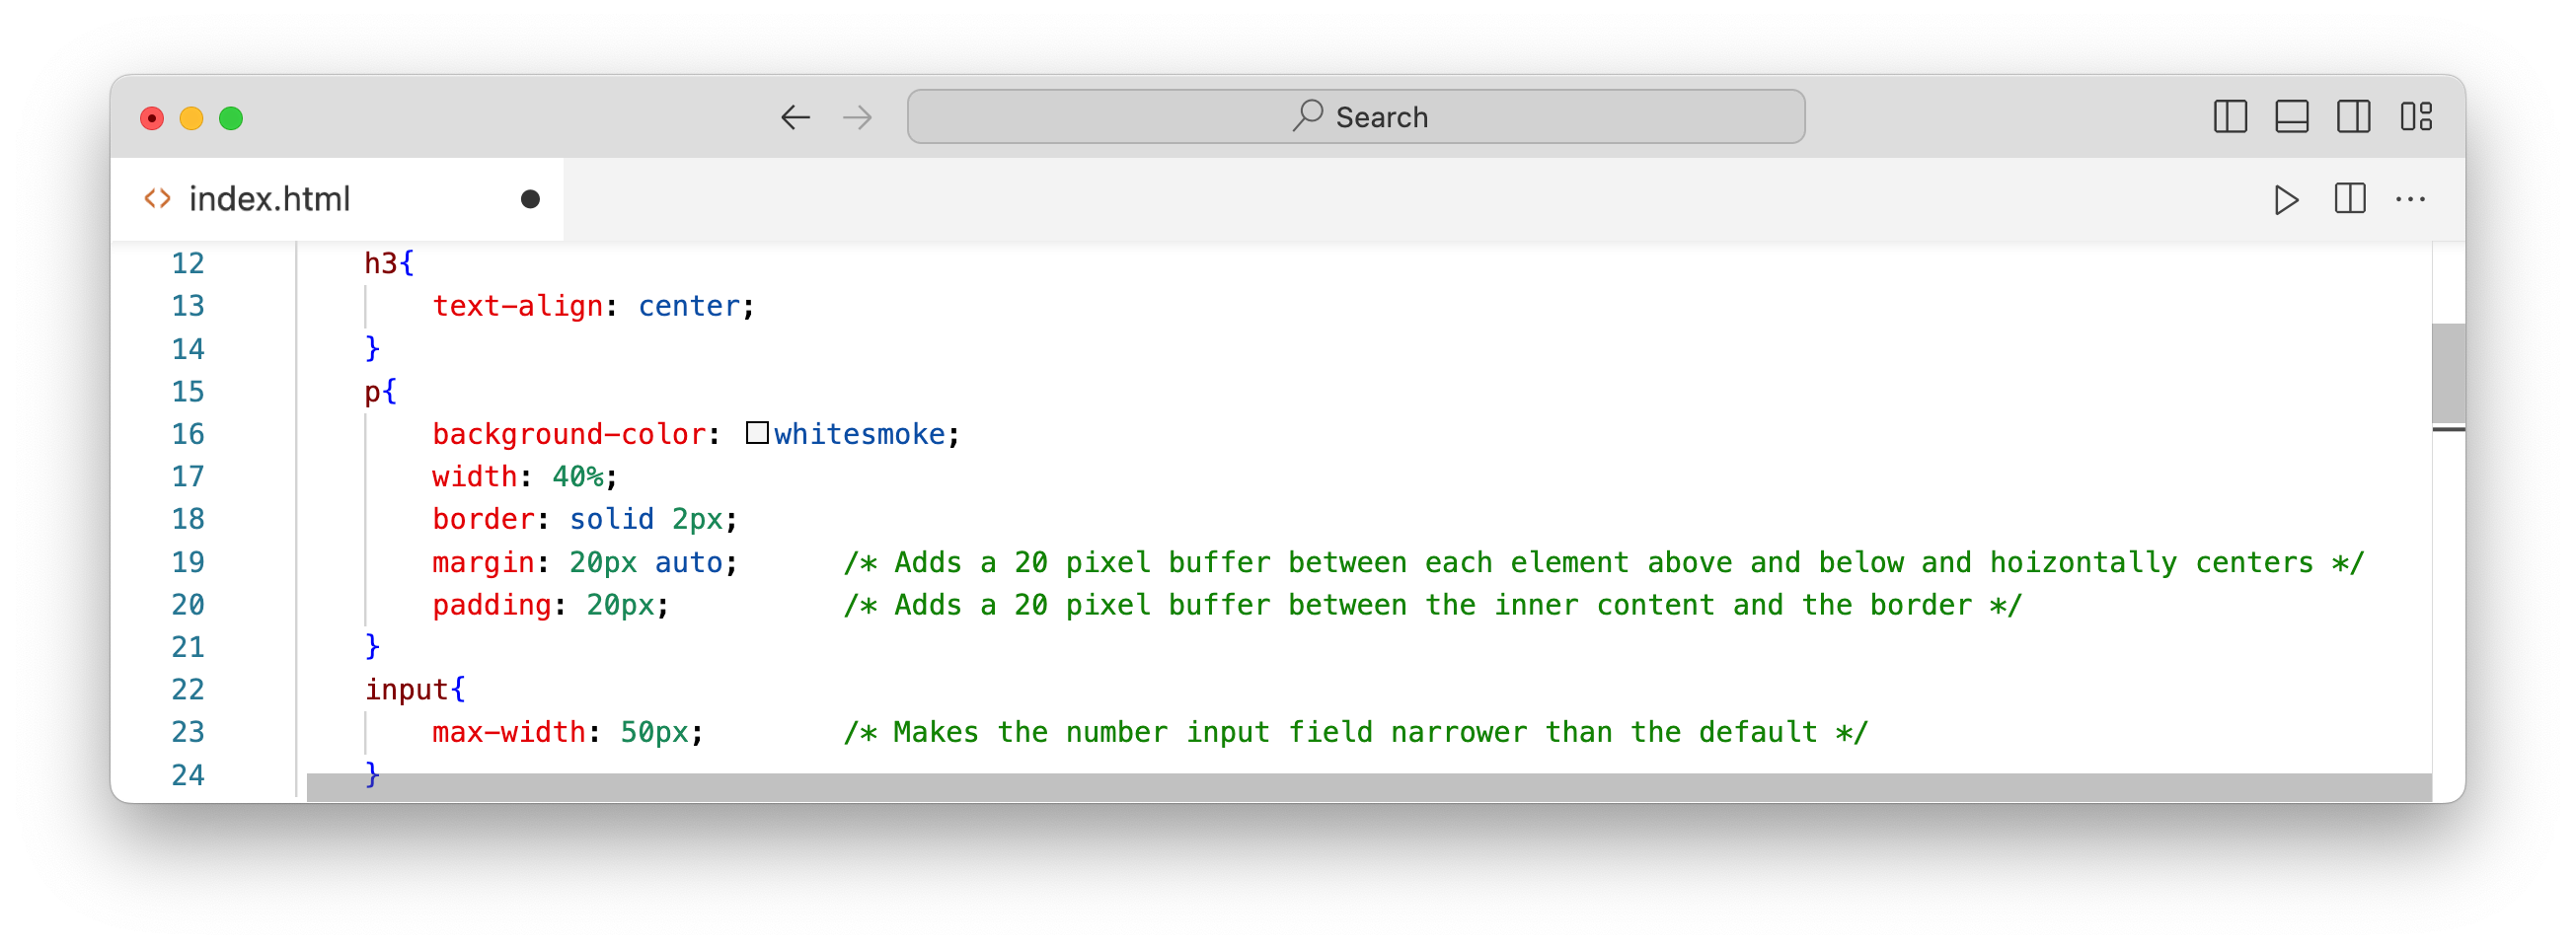
Using the padding attribute, we can add 20 pixels of buffer between the inner content and the border.
Using the margin attribute, we can add 20 pixels of buffer above and below each <p> element. Notice that we have added auto after 20px: We are only adding 20 pixels above and below. To the sides, we are specifying that the buffer space be 1) as large as possible, and 2) equal on the left and right. This has the effect of centering the element on the page.
We can also style our button:
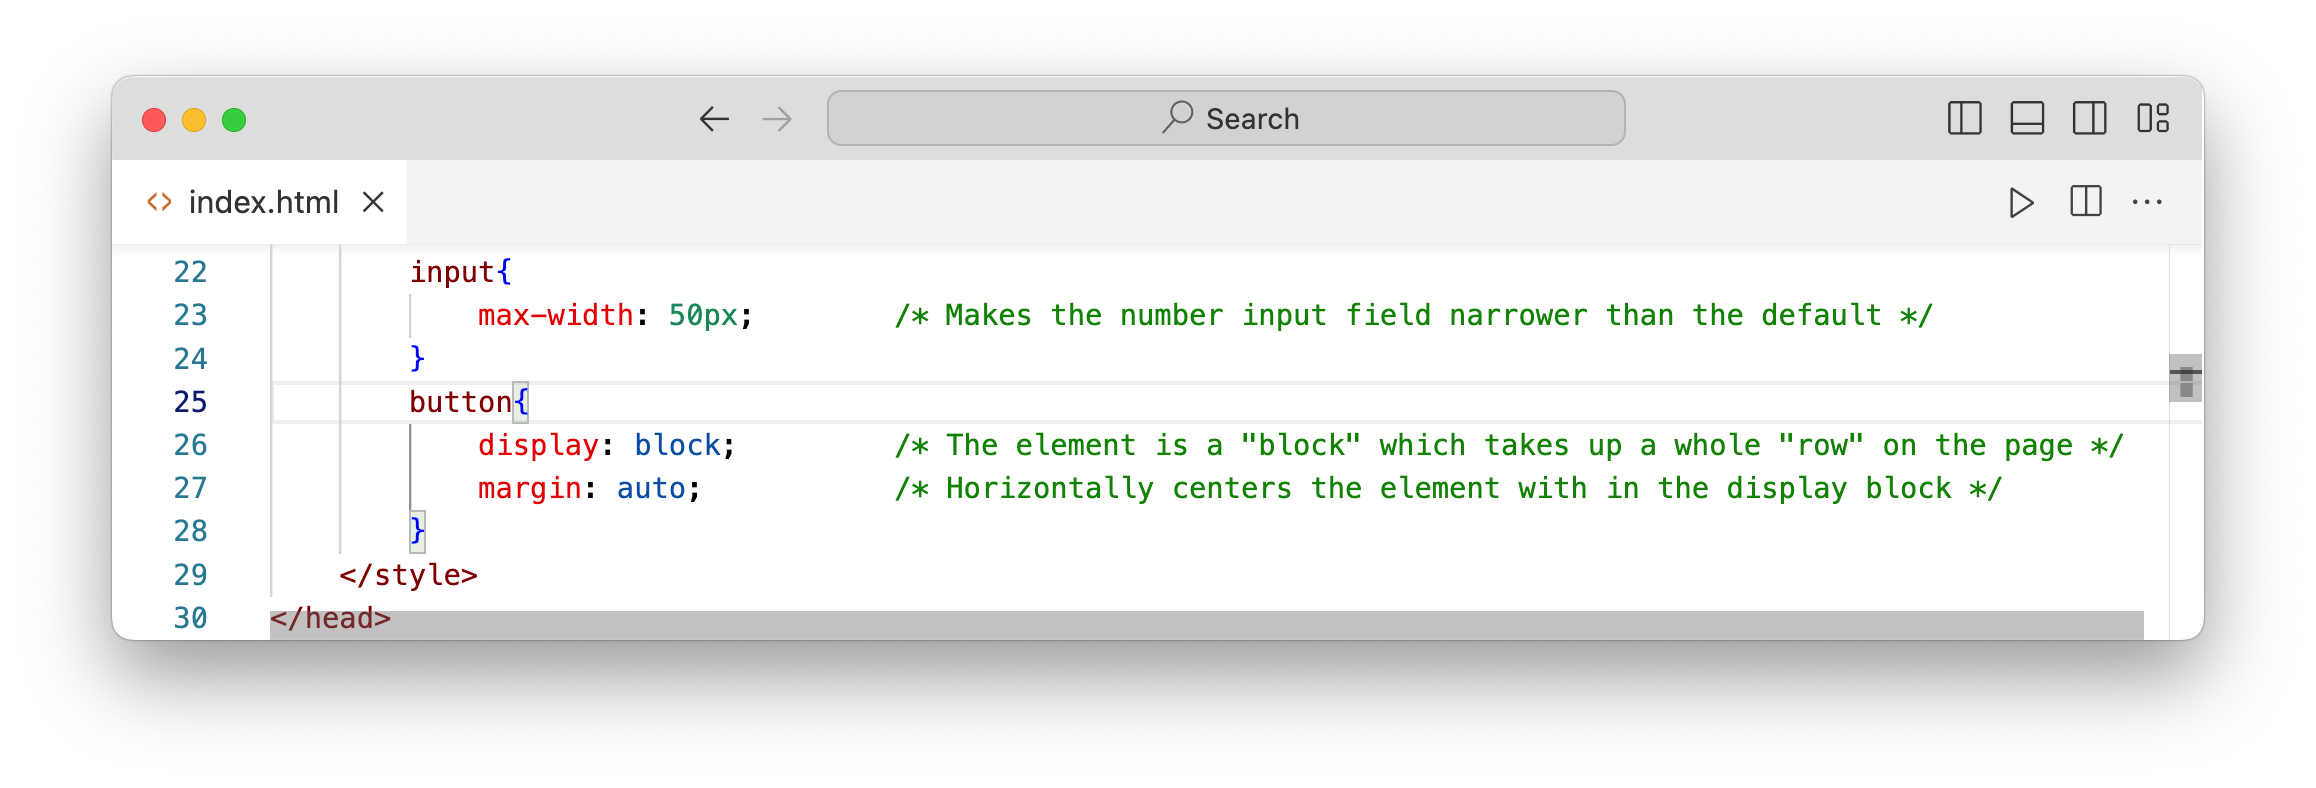
Similarly to the previous step we are specifying margin: auto in order to center the button on the page. However, unlike with the <p> element, we need to specify that the button be displayed as a block element (as opposed to the default, inline). <p> elements are displayed as block elements by default. You can read more about inline vs block display in this w3schools article or this stackoverflow question.
Let's see the result:

Much better, right?
Conclusion
Congratulations! You now have a functioning (and presentable) p-value calculator!
Again, If you are looking for a comprehensive CSS instructional resource, I recommend the material at w3schools.
In the next, and final, section of this tutorial, we will wrap-up by offering some optional design challenges and to present other tutorials in our larger p-value calculator series (this is just the first of several tutorials).